 Save
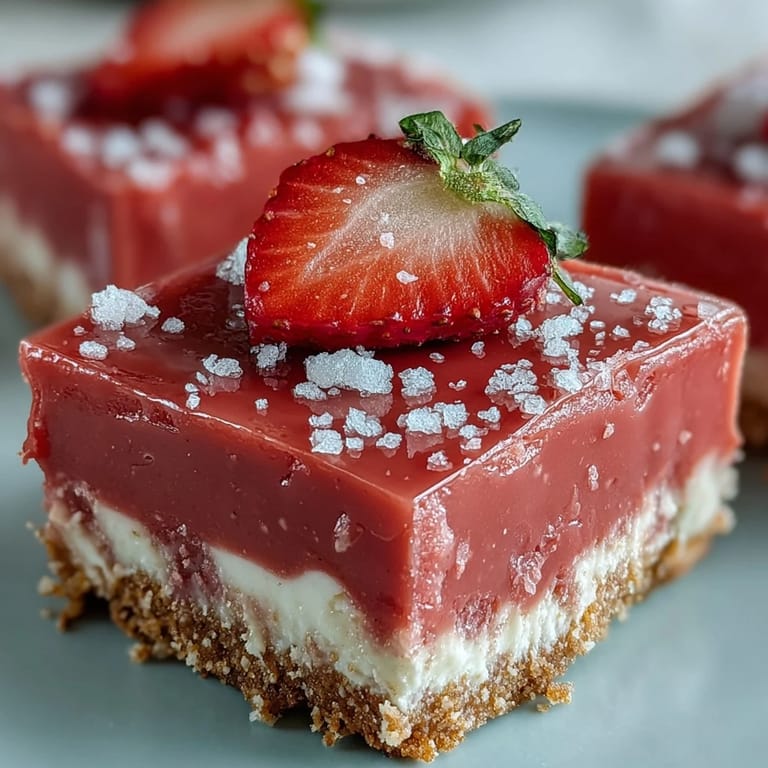
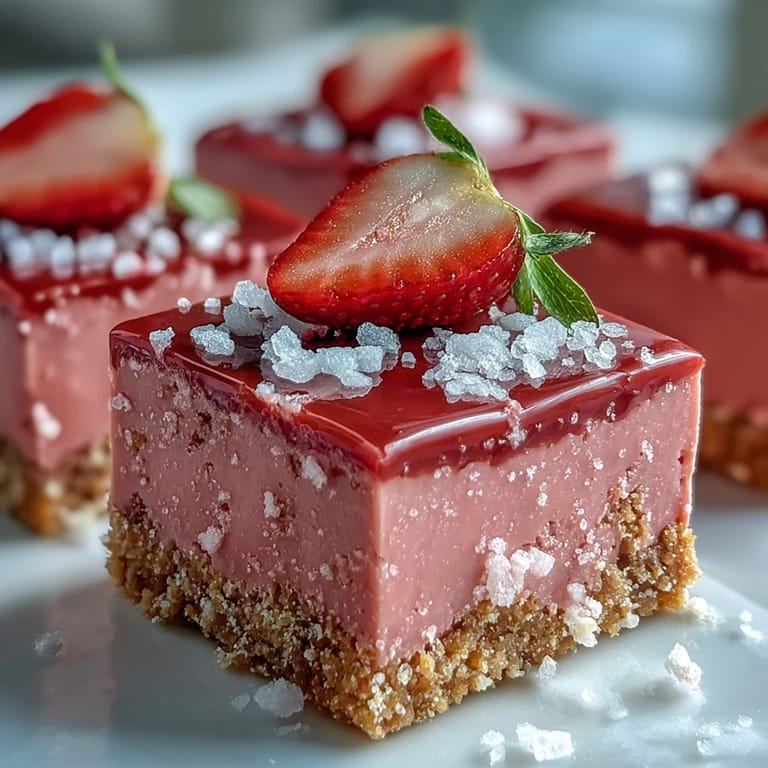
Save The first bite of these squares happened on a sticky June afternoon when I'd accidentally bought two bags of freeze-dried strawberries instead of fresh ones at the market. I stared at them on the counter, slightly annoyed, until I remembered a white chocolate bar tucked in the pantry. Twenty minutes of melting, stirring, and pressing later, I had a pan of something I didn't quite plan but couldn't stop tasting. The color alone made me smile, this unapologetic bubblegum pink that looked like summer in a square.
I brought these to a backyard barbecue once, stacked in a clear container so the pink layers showed through. My friend's daughter, who usually picks around dessert, ate three squares and asked if I could teach her how to make them. We ended up in my kitchen the next weekend, her carefully pressing the crust flat with the bottom of a glass, both of us laughing when the white chocolate seized for a second before smoothing out. She still texts me photos every time she makes a batch.
Ingredients
- Digestive biscuits or graham crackers: The buttery, slightly sweet base holds everything together without competing with the fudge, crush them fine so the crust packs tight and slices clean.
- Unsalted butter: Melted butter binds the crumbs into a solid foundation, and using unsalted lets you control the sweetness without any salty surprises.
- White chocolate chips: The creamy backbone of the fudge layer, choose good quality chips or bars because they melt smoother and taste less waxy.
- Sweetened condensed milk: This thick, sugary miracle turns white chocolate into fudge instead of ganache, and it sets firm in the fridge without any fuss.
- Freeze-dried strawberries: Ground into powder, they deliver intense berry flavor and that vibrant pink hue without adding liquid that would soften the fudge.
- Pure vanilla extract: A teaspoon deepens the strawberry notes and rounds out the sweetness so it doesn't taste one-dimensional.
- Pinch of salt: Brightens all the flavors and keeps the white chocolate from tasting flat or too sugary.
- Gel food coloring: Optional, but a drop or two turns the fudge into that eye-catching pink that makes everyone reach for seconds.
Tired of Takeout? 🥡
Get 10 meals you can make faster than delivery arrives. Seriously.
One email. No spam. Unsubscribe anytime.
Instructions
- Prep the pan:
- Line your square pan with parchment, letting the edges hang over like little handles. This trick means you can lift the whole slab out later and slice it on a cutting board without wrestling it out in crumbly pieces.
- Make the crust:
- Toss the crushed biscuits with melted butter until every crumb is coated and the mixture clumps when you squeeze it. Press it firmly into the pan, using the back of a spoon or the bottom of a glass to get it flat and even, then chill it for ten minutes so it hardens up.
- Melt the fudge base:
- Set a heatproof bowl over simmering water and add the white chocolate and condensed milk, stirring gently until everything melts into one glossy pool. Don't let the bowl touch the water or the chocolate might seize, and keep the heat low and patient.
- Flavor and color:
- Pull the bowl off the heat and stir in the strawberry powder, vanilla, salt, and food coloring if you're using it. Mix until the color is even and the powder dissolves completely, no streaks or lumps.
- Assemble:
- Pour the pink fudge over the chilled crust and spread it to the edges with a spatula, smoothing the top as best you can. It doesn't have to be perfect, just even enough that it sets uniformly.
- Chill and set:
- Cover the pan loosely with plastic wrap and slide it into the fridge for at least two to three hours. The fudge needs time to firm up, so resist the urge to cut it early or you'll end up with a gooey mess instead of clean squares.
- Slice and serve:
- Lift the whole slab out using the parchment, set it on a cutting board, and slice into sixteen squares with a sharp knife. Wipe the blade between cuts for the neatest edges, and top each square with a fresh strawberry slice or a sprinkle of freeze-dried pieces if you're feeling fancy.
 Save
Save These squares became my go-to whenever I needed something pretty and easy, the kind of dessert that makes people ask for the recipe before they've even finished chewing. I've made them for baby showers, bake sales, and quiet Sunday afternoons when I just wanted something sweet without turning on the oven. Every time I pull them from the fridge, that bright pink still makes me happy, like a little burst of summer no matter the season.
Choosing Your Strawberries
Freeze-dried strawberries are my preference because they grind into a fine, shelf-stable powder that won't water down the fudge. If you use fresh strawberries, puree them smooth and strain out the seeds, then reduce the puree in a small saucepan until it's thick and jammy, otherwise the extra liquid will keep the fudge from setting firm. I learned this the hard way when my first batch with fresh berries stayed soft and sticky, delicious but impossible to slice cleanly.
Storage and Make-Ahead Tips
These squares keep beautifully in the fridge for up to five days, stacked between layers of parchment in an airtight container so they don't pick up any stray smells. I've also frozen them for up to a month, wrapping each square individually in plastic wrap and tucking them into a freezer bag, then thawing them in the fridge overnight before serving. They're one of those rare desserts that actually taste better the next day, when the flavors have had time to settle and meld together.
Variations and Swaps
You can swap the strawberry powder for freeze-dried raspberries, blueberries, or even mango for a completely different flavor, and the method stays exactly the same. For a dairy-free version, use coconut condensed milk and dairy-free white chocolate, though the texture will be slightly softer and the flavor a bit less creamy. I've also added a swirl of crushed fresh raspberries on top before chilling for a marbled effect that looks stunning and adds a tart contrast to the sweet fudge.
- Try a chocolate cookie crust for a cookies-and-cream twist that plays nicely with the berry flavor.
- Sprinkle coarse sugar crystals on top right before serving for a little sparkle and crunch.
- Drizzle melted dark chocolate over the finished squares for a fancy touch that cuts the sweetness just enough.
 Save
Save These little pink squares have a way of making any moment feel a bit more special, whether you're sharing them with a crowd or sneaking one straight from the fridge at midnight. I hope they bring you as much joy as they've brought me, one sweet, creamy, strawberry-bright bite at a time.
Common Questions
- → Can I use fresh strawberries instead of freeze-dried?
Yes, you can substitute 100g fresh strawberries puréed and strained. However, freeze-dried strawberries provide a more concentrated flavor and won't add excess moisture that could affect the fudge's texture.
- → How long do these squares need to chill before serving?
Refrigerate for at least 2-3 hours until the fudge layer is firm to the touch. For best results, let them stand at room temperature for 10 minutes before serving to achieve a softer, creamier texture.
- → Can I make these dairy-free?
Absolutely. Substitute dairy-free white chocolate and coconut condensed milk for the traditional versions. The texture and setting time may vary slightly, but the result will still be delicious.
- → What's the purpose of the graham cracker crust?
The crust provides a crunchy, buttery foundation that contrasts beautifully with the smooth, creamy fudge layer. It also adds structural stability, making the squares easier to lift and serve.
- → How should I store leftover squares?
Store in an airtight container in the refrigerator for up to 5 days. The cold temperature helps maintain the fudge's firm texture. Separate layers with parchment paper to prevent sticking.
- → Can I add other berries to this fudge?
Yes, try swirling in crushed raspberries for a marbled berry effect or experiment with other freeze-dried berries like blueberries or raspberries for different flavor variations.