 Save
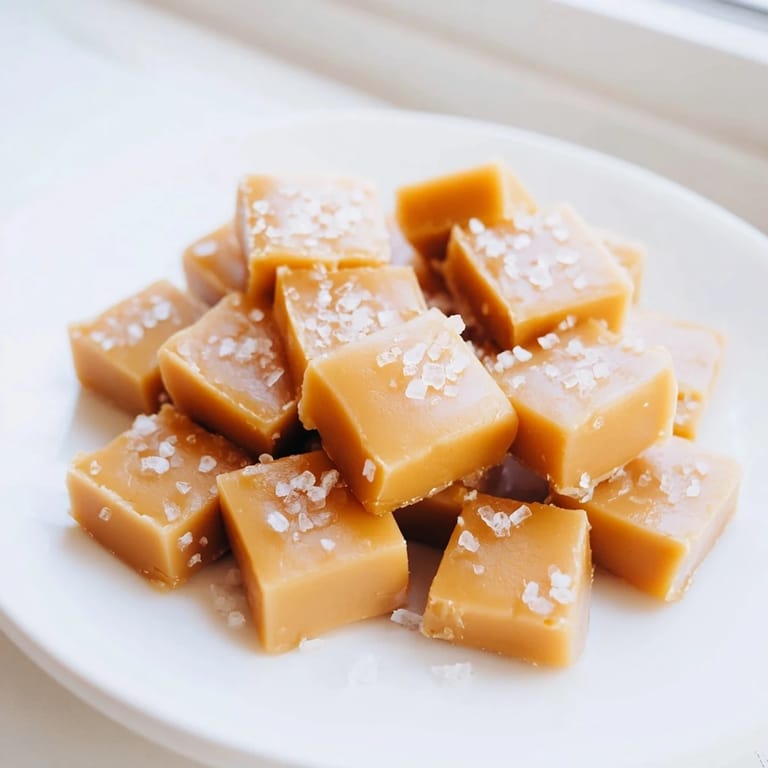
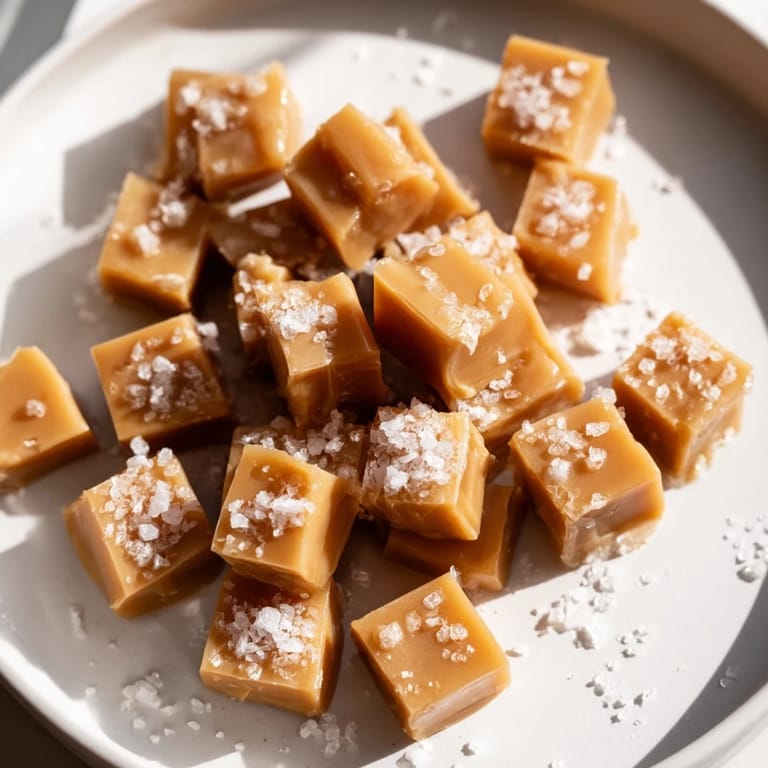
Save I discovered the magic of sea salt caramels on a gray afternoon when my neighbor brought over a small box wrapped in brown paper. Inside were these glossy, amber squares with just a whisper of salt crystals on top, and one bite completely changed how I thought about candy. That first taste—the way the buttery caramel melted on my tongue while the salt hit just right—sent me straight to the kitchen to figure out how she'd made them. Now, years later, I make them whenever I want to feel like I've got something special to share.
I remember making a batch for my sister's book club and watching everyone go quiet the moment they tasted one. That silence was better than any compliment—it meant the balance was perfect, that the salt had done its job of making the sweetness sing louder.
Ingredients
- Heavy cream: This is your insurance policy for smooth, creamy caramels; cold cream creates that dramatic bubble when it hits the hot sugar, so don't skip the warming step.
- Unsalted butter: Cut it into pieces so it melts faster and distributes evenly through the cream.
- Granulated sugar: Use fresh sugar; old sugar can crystallize and ruin your whole batch.
- Light corn syrup: This prevents unwanted crystallization and keeps your caramels silky.
- Water: Just enough to get the sugar moving before the heat takes over.
- Pure vanilla extract: Added off heat so the flavor stays bright and true.
- Fine sea salt (for the mixture): This dissolves into the caramel and seasons it from within.
- Flaky sea salt (Maldon style, for topping): This is the star—those delicate crystals on top create little bursts of salt in each bite.
Tired of Takeout? 🥡
Get 10 meals you can make faster than delivery arrives. Seriously.
One email. No spam. Unsubscribe anytime.
Instructions
- Prep your pan like you mean it:
- Line your 8x8-inch pan with parchment paper, leaving overhang on two sides so you can lift everything out without wrestling with it. Butter the parchment lightly—this prevents sticking and makes life easier later.
- Warm your cream mixture gently:
- Combine cream and butter in a small saucepan over medium heat. You want it hot and the butter fully melted, but not boiling; if it boils, tiny bubbles form and make your finished caramels grainy.
- Start your sugar without stirring:
- In a large, heavy-bottomed saucepan, combine sugar, corn syrup, and water. Stir just once to combine, then let the heat do the work—stirring during cooking can cause crystallization that ruins everything.
- Watch for that light golden color:
- When the mixture reaches a light golden hue and your thermometer reads 320°F (160°C), you're at the perfect moment. Too light and it'll taste less caramelly; too dark and you'll get bitter. Trust your eyes and the thermometer.
- Add the cream with confidence:
- Carefully pour the warm cream and butter into the caramelized sugar—it will bubble up dramatically and look a little scary. Stay calm and stir constantly; this is where the magic happens as everything comes together into smooth, glossy caramel.
- Cook to your preferred texture:
- Keep stirring until your thermometer reaches 245°F (118°C) for softer, more yielding caramels, or up to 250°F (121°C) if you prefer them firmer with a little more resistance.
- Finish with flavor:
- Remove from heat and stir in vanilla extract and fine sea salt. The heat will carry the vanilla through the mixture, and the salt will dissolve just enough to season everything evenly.
- Pour and crown with salt:
- Immediately pour the hot caramel into your prepared pan. Let it sit for 5 minutes so it cools just slightly, then sprinkle flaky sea salt across the top in an even layer—those crystals will stick slightly and look beautiful.
- Cool with patience:
- Leave it at room temperature for about 2 hours until it's completely set. Resist the urge to refrigerate; you want the caramels to set slowly so they have that perfect soft, pull-apart texture.
- Cut and wrap with care:
- Use a sharp knife and cut into 1-inch squares. Dip your knife in warm water and wipe it clean between cuts to prevent sticking; this makes the difference between clean squares and messy ones.
- Wrap to preserve:
- Wrap each piece in wax paper or cellophane so they don't stick together and stay fresh longer.
 Save
Save The first batch I made, I was so nervous about the temperature that I checked the thermometer constantly and nearly overcooked the whole thing. Now I know that waiting and trusting the process is half the fun, and those moments of anticipation are part of what makes homemade candy special.
The Salt-and-Sweet Sweet Spot
What makes these caramels sing is the contrast—and it's not accidental. The flaky sea salt on top hits your tongue first, a bright little jolt that makes you actually taste the richness of the caramel underneath. Without it, they're just sweet candy. With it, they become something memorable. The fine sea salt mixed into the batch is quieter, dissolving into the caramel to season it from within, so every bite is balanced and never cloying.
Storage and Gifting
These caramels keep beautifully in an airtight container at room temperature for up to two weeks, though they rarely last that long in my house. I love wrapping them in kraft paper with a simple label, or tucking a few into a small box for friends. There's something about a homemade caramel that feels like genuine care wrapped up in cellophane.
Variations Worth Trying
Once you've mastered the basic recipe, the door opens to endless possibilities. Brown the butter before adding it to the cream for a deeper, nuttier flavor that elevates the whole batch. Dip the cooled caramels in melted dark chocolate, or try sprinkling them with fleur de sel, smoked salt, or even a tiny pinch of cayenne pepper for intrigue. Some people swear by a hint of espresso powder stirred into the caramel, or a touch of bourbon added along with the vanilla.
- Brown butter for that toasted, complex flavor that makes people ask what your secret ingredient is.
- Dark chocolate dipping transforms them into something you'd see in a fancy candy shop.
- Experiment with different finishing salts—smoked, fleur de sel, or even a whisper of floral salt takes them in new directions.
 Save
Save Making homemade caramels is one of those kitchen moments that feels fancier than it actually is. Once you've done it once and tasted that perfect balance of sweet, salty, and buttery, you'll keep making them.
Common Questions
- → How do I achieve soft texture in these caramels?
Cooking the caramel mixture to around 245°F (118°C) ensures a soft, chewy texture. Avoid overheating to keep them tender.
- → Why is flaky sea salt used in this treat?
Flaky sea salt adds a delicate crunch and enhances the caramel's sweetness with a balanced salty contrast.
- → Can I store these sweets, and how long will they last?
Keep them in an airtight container at room temperature; they maintain freshness for up to two weeks.
- → What is the purpose of corn syrup in the mixture?
Corn syrup prevents crystallization, helping to keep the caramel smooth and glossy.
- → Is it possible to add chocolate to these caramels?
Yes, dipping the cooled caramels in melted dark chocolate adds an indulgent twist to their buttery sweetness.