 Save
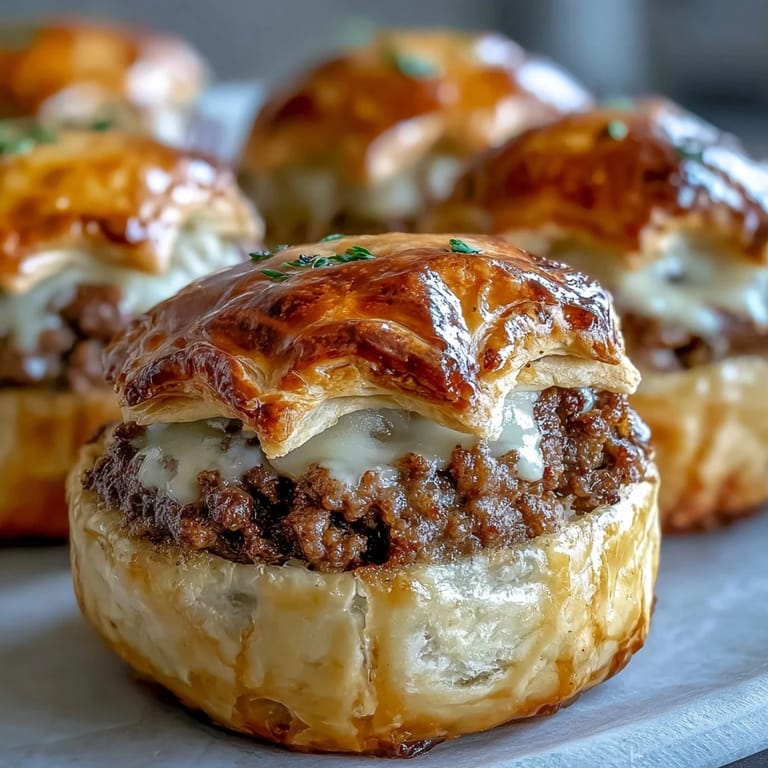
Save My neighbor showed up one December afternoon with a tin of these still warm from her oven, and I ate three before even asking what they were called. The buttery pastry shattered at the first bite, giving way to a filling so warmly spiced it tasted like the holidays had been folded inside. I begged for the recipe on the spot, and she laughed and said her grandmother would be proud. Now I make them every year, and they disappear faster than I can pull them from the oven.
I brought a platter of these to a potluck once, thinking they might get lost among the casseroles and dips. Instead, people kept circling back, asking what was in them, marveling at the crust. One friend said they reminded her of something her French-Canadian aunt used to make at Christmas, and suddenly we were all swapping stories about holiday foods we missed. It was one of those moments where a recipe becomes a conversation.
Ingredients
- Cream cheese, softened: This is what makes the pastry so tender and rich, almost like a savory shortbread that melts on your tongue.
- Unsalted butter, cold and diced: Keep it cold so it creates flaky layers when you roll out the dough.
- All-purpose flour: The backbone of the pastry, just enough to hold everything together without making it tough.
- Salt (for pastry): A small amount brightens the buttery flavor and balances the richness of the cream cheese.
- Ground beef: I use 80/20 for flavor, but leaner beef works if you prefer less fat.
- Onion, finely chopped: It sweetens as it cooks and adds depth to the filling.
- Garlic, minced: Just one clove is enough to add warmth without overpowering the spices.
- Ground allspice: This is the secret ingredient that makes the filling taste unmistakably festive.
- Ground cinnamon: It adds a gentle sweetness that plays beautifully with the savory beef.
- Ground cloves: A tiny pinch goes a long way, adding a warm, almost floral note.
- Dried thyme: It brings an earthy, herbal balance to all the sweet spices.
- Salt and black pepper: Season the filling so every bite tastes full and rounded.
- Beef broth: It keeps the filling moist and adds a deeper, meatier flavor.
- Fresh parsley, chopped: Optional, but it brightens the filling and adds a pop of color.
- Unsalted butter (for filling): Used to cook the onions and add a bit of richness to the beef.
- Egg, beaten: Brushed on top for a gorgeous golden shine that makes them look bakery-perfect.
Tired of Takeout? 🥡
Get 10 meals you can make faster than delivery arrives. Seriously.
One email. No spam. Unsubscribe anytime.
Instructions
- Make the pastry dough:
- Blend the softened cream cheese and cold butter until smooth and creamy, then mix in the flour and salt until a soft dough comes together. Divide it in half, flatten each piece into a disk, wrap them in plastic, and chill for at least 30 minutes so the dough is easy to roll.
- Cook the beef filling:
- Melt the butter in a skillet over medium heat, then cook the onion until soft and translucent. Add the garlic and cook for a minute until fragrant, then add the ground beef and cook until browned, breaking it up as it cooks.
- Season and simmer:
- Stir in the allspice, cinnamon, cloves, thyme, salt, and pepper, then pour in the beef broth and let it simmer until most of the liquid has evaporated, about 5 minutes. Remove from heat, stir in the parsley if using, and let the filling cool completely.
- Preheat and prep:
- Set your oven to 200°C (400°F) and line two baking sheets with parchment paper.
- Roll and cut the pastry:
- On a floured surface, roll out one disk of dough to about 3 mm (1/8 inch) thick, then use a 7 cm round cutter to cut out circles. Gather and reroll scraps as needed.
- Fill and seal:
- Place half the rounds on your prepared baking sheets, spoon a heaping teaspoon of cooled filling onto each, then brush the edges lightly with water and top with another pastry round. Press the edges with a fork to seal them tightly.
- Brush and vent:
- Brush the tops with beaten egg for a beautiful golden finish, then cut a small slit in the top of each to let steam escape.
- Bake until golden:
- Bake for 18 to 22 minutes, or until the pastries are puffed and deeply golden brown. Let them cool on the pan for a few minutes before serving.
 Save
Save The first time I served these at a holiday party, I watched a woman close her eyes after the first bite and smile like she'd been transported somewhere warm and familiar. She told me later that her grandmother used to make tourtière every Christmas Eve, and these little pastries brought it all back. That's when I realized food isnt just about taste, its about the memories we carry and the ones we create.
Making the Dough Ahead
You can make the pastry dough up to two days before you plan to bake. Just wrap each disk tightly in plastic wrap and keep it in the fridge until youre ready to roll it out. If its too firm to roll when you take it out, let it sit at room temperature for about 10 minutes to soften slightly. I love doing this step ahead because it makes the actual assembly feel quick and almost effortless on the day of.
Flavor Variations
Ive added finely diced mushrooms to the filling before, and they bring an earthy richness that pairs beautifully with the spices. You could also swap the beef for ground pork or even a mix of the two for a slightly sweeter, more traditional tourtière flavor. Some people like to add a pinch of nutmeg or a splash of Worcestershire sauce, and both work wonderfully if you want to deepen the savory notes.
Serving and Storage
These are best served warm or at room temperature, and they pair beautifully with cranberry chutney, Dijon mustard, or even a tangy apple relish. Leftovers keep in the fridge for up to three days, and you can reheat them in a 180°C (350°F) oven for about 8 minutes to crisp them back up. They also freeze beautifully either baked or unbaked, so you can pull out a batch whenever you need them.
- Freeze unbaked tourtières on a tray until solid, then transfer to a freezer bag and bake straight from frozen, adding a few extra minutes.
- Reheat baked tourtières from frozen in a 180°C oven for 12 to 15 minutes.
- Serve them on a platter with little bowls of mustard and chutney for dipping.
 Save
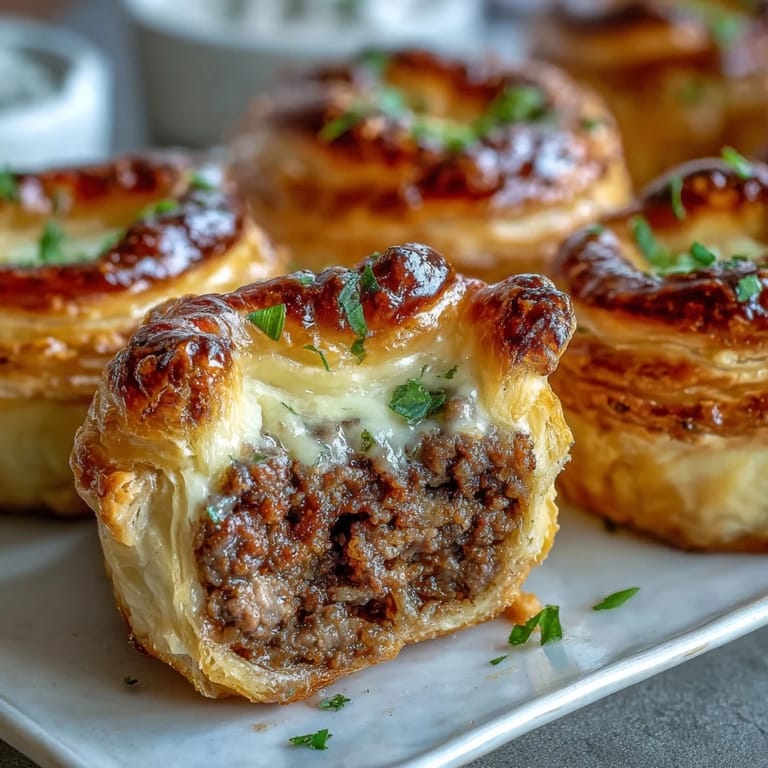
Save Every time I pull a tray of these from the oven, the kitchen smells like cinnamon and butter and something unmistakably festive. Theyre small, theyre simple, and they disappear fast, but they always leave people smiling.
Common Questions
- → Can I make the pastry dough ahead of time?
Yes, the cream cheese pastry can be prepared up to 2 days in advance and stored in the refrigerator. Wrap it tightly in plastic wrap to prevent drying out.
- → Can I freeze these tourtières?
Absolutely. Freeze unbaked tourtières on a baking sheet, then transfer to a freezer bag. Bake directly from frozen, adding 5-7 minutes to the cooking time.
- → What can I serve with mini tourtières?
These pair beautifully with cranberry chutney, Dijon mustard, or a tangy fruit relish. They also complement a simple green salad for a light meal.
- → Can I substitute the ground beef?
Yes, ground pork, turkey, or a mixture of beef and pork works well. Adjust seasonings to taste, as different meats have varying flavor profiles.
- → Why is my pastry tough instead of flaky?
Overworking the dough develops gluten, making it tough. Mix just until combined and ensure your butter stays cold throughout the process for optimal flakiness.
- → How do I prevent soggy bottoms?
Ensure the filling has cooled completely before assembling, and make sure most of the beef broth has evaporated during cooking. This prevents excess moisture from softening the pastry.