 Save
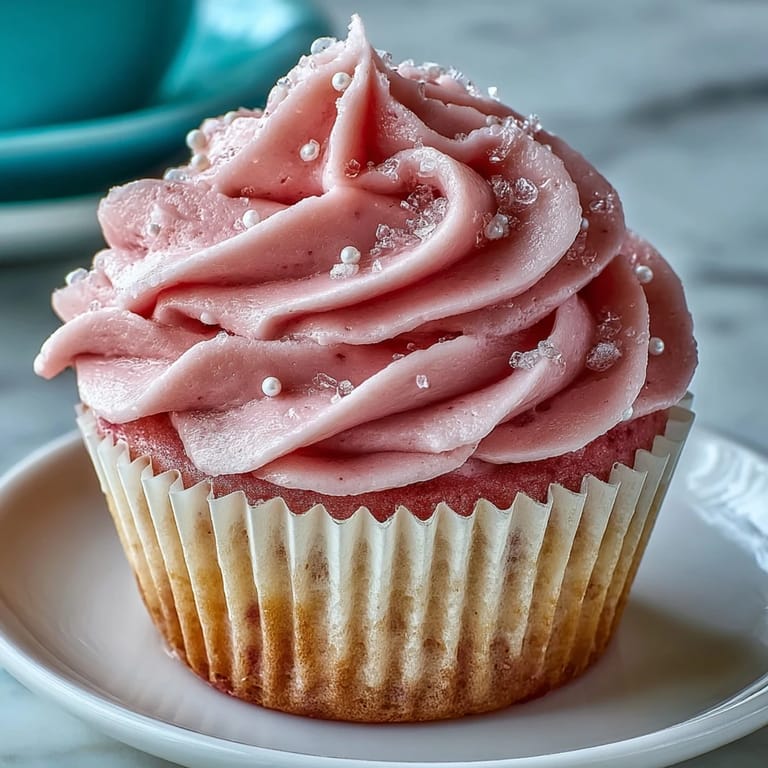
Save My neighbor stopped by one Tuesday afternoon with a box of pale pink cupcakes, and I watched her face light up as everyone bit into one. The color was so soft, almost apologetic in its prettiness, but that first taste made me understand why she'd spent her morning baking them. Something about the tanginess cut through the sweetness in a way that made you want another immediately. I asked for the recipe that same day, and now these velvet cupcakes have become my go-to whenever I need to bring something that looks elegant but tastes undeniably homey.
I baked these for my daughter's small birthday gathering last spring, and I remember frosting them while she set the table, both of us moving around the kitchen with that easy rhythm you get when you're genuinely happy. She piped the frosting onto three of them herself, and while her swirls weren't perfect, they were hers, and somehow that made them more beautiful than anything I could have done alone. Watching her friends pick the ones she'd decorated first taught me that imperfection in baking is actually its own kind of charm.
Ingredients
- Cake flour: This matters because it has less protein than all-purpose flour, which gives you that tender crumb you're after; if you only have all-purpose on hand, sifting in a bit of cornstarch does the trick just fine.
- Unsalted butter (for cupcakes and frosting): Room temperature is non-negotiable here because cold butter won't cream properly with sugar, and you'll end up with a dense, gritty texture instead of that cloud-like structure.
- Buttermilk and white vinegar: Together they create a subtle tangy note that makes people pause mid-bite and say what is that, exactly—it's the secret that keeps these from feeling one-note.
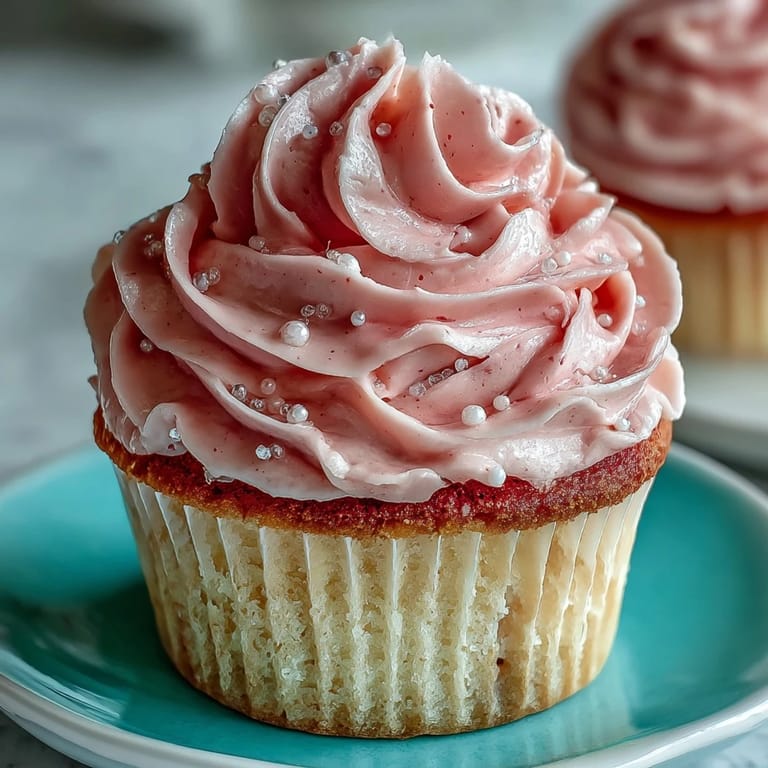
- Pink gel food coloring: Gel holds its hue better than liquid food coloring, and it won't thin out your batter the way the watery kind would, so your pink stays true and vibrant.
- Powdered sugar (sifted): Sifting removes the tiny lumps that can make frosting grainy, and it's worth the extra thirty seconds of effort to taste the difference.
- Heavy cream or whole milk: Just two tablespoons changes everything, thinning the frosting so it spreads or pipes smoothly without making it weepy or unstable.
Tired of Takeout? 🥡
Get 10 meals you can make faster than delivery arrives. Seriously.
One email. No spam. Unsubscribe anytime.
Instructions
- Set up your station:
- Preheat the oven to 350°F and line your muffin tin with paper liners—you'll want everything ready so you can move through the next steps without rushing. Having your mise en place organized means you won't scramble halfway through.
- Dry ingredients matter:
- Sift the cake flour, baking powder, baking soda, and salt together into a bowl and give it a gentle whisk. This aerates the flour and distributes the leavening agents evenly, which is what gives you that tender, even rise.
- Cream the butter and sugar:
- Beat the room-temperature butter for a full minute until it's pale and smooth, then gradually add sugar while beating for 2–3 minutes until the mixture looks light and fluffy. This process incorporates air into the batter, which helps the cupcakes rise properly and stay tender.
- Add the egg gently:
- Lightly beat the egg in a small bowl first, then add it slowly to the butter mixture on low speed, making sure it's fully incorporated before moving on. Adding it all at once can break the emulsion, which changes your texture.
- Alternate wet and dry:
- Add one-third of the dry ingredients, then half the buttermilk, then another third of the dry, the rest of the buttermilk, and finally the last third of dry ingredients, mixing on low speed after each addition. This method keeps your batter smooth and prevents overmixing, which is what creates tough cupcakes.
- Tint the batter:
- Stir the white vinegar and pink gel food coloring together in a small cup, then add it to the batter on low speed and mix until the color is even and no streaks remain. The color will deepen slightly as it bakes, so don't panic if it looks pale at this stage.
- Fill and tap:
- Divide the batter evenly among the liners, filling each about two-thirds full, then tap the tin gently on the counter a few times to release any trapped air bubbles. This helps your cupcakes bake evenly and prevents air pockets inside.
- Bake with confidence:
- Bake for 18–22 minutes, checking around the 18-minute mark with a toothpick; it should come out clean or with just a few moist crumbs. Every oven is different, so trust your eyes and that toothpick more than the timer.
- Cool properly:
- Let the cupcakes rest in the pan for 5 minutes—this gives them time to set slightly before you transfer them to a wire rack. Cooling completely before frosting is essential, otherwise your frosting will melt and slide right off.
- Make the frosting:
- Beat the room-temperature butter until creamy, then gradually add 2 cups of powdered sugar on low speed before switching to medium and beating for about 2 minutes until smooth. Add the vanilla, cream, and salt, then beat on medium-high for another 1–2 minutes until it's light and fluffy.
- Adjust as needed:
- If your frosting is too soft, add more powdered sugar a tablespoon at a time; if it's too stiff, add a bit more cream. Taste as you go because frosting is very forgiving once you understand how your ingredients respond.
- Frost and celebrate:
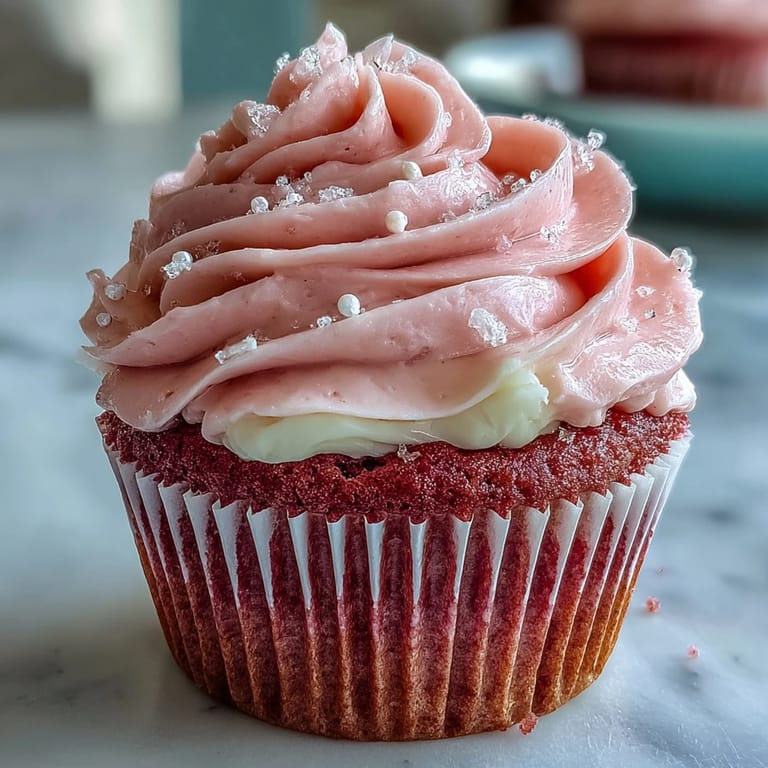
- Transfer frosting to a piping bag with your favorite tip or use a small offset spatula, then frost each cooled cupcake with a generous swirl. Decorate with sprinkles, edible pearls, or pink sanding sugar while the frosting is still soft so they stick.
 Save
Save One rainy Saturday, I made these cupcakes with my best friend while we talked through a difficult decision she was facing, and I realized that baking together can be a form of listening. We frosted them slowly, deliberately, and by the time we were done, she'd worked through most of what was bothering her. Food has a way of creating space for conversation that doesn't happen when you're just sitting across from each other.
The Science of Pink
Pink comes from the interaction between the vinegar's acidity and the food coloring, which is why these cupcakes get their blush hue in the batter rather than looking artificially dyed. If you're hesitant about gel food coloring for any reason, beet powder gives you a more natural pink, though the flavor will shift slightly toward an earthy note that some people actually prefer. The color deepens in the oven as the cupcakes bake, so what looks pale in the liner will be a proper pink when you peel back the paper.
Texture Matters
The difference between a good cupcake and one people actually crave comes down to moisture and crumb structure, which is why this recipe uses both buttermilk and vinegar. The buttermilk adds tenderness through lactic acid while the vinegar reacts with the baking soda to create lift and a subtle tang that makes your taste buds stand up and pay attention. If you find your cupcakes are coming out a bit dry, try substituting two tablespoons of buttermilk with sour cream next time—that extra fat makes them even more tender.
Storage and Serving
These cupcakes stay fresh in an airtight container at cool room temperature for up to two days, and the frosting stays stable enough that you won't find it melting into puddles. If you're baking ahead for an event, you can bake the cupcakes a day in advance and frost them the morning of, which removes some of the last-minute stress. Just remember that room temperature is the sweet spot for storing them—the fridge will dry them out faster than you'd expect.
- Unfrosted cupcakes can be wrapped individually and frozen for up to a month, then thawed at room temperature and frosted when you're ready to serve them.
- If you're making mini cupcakes instead of standard size, fill the liners halfway and reduce the baking time to 10–12 minutes, checking early because small cupcakes can dry out quickly.
- These cupcakes actually taste better after sitting for a few hours once frosted, as the flavors meld together into something more cohesive than when they're fresh from the piping bag.
 Save
Save These pink velvet cupcakes have become more than just a dessert in my kitchen—they're what I reach for when I want to show someone I was thinking of them, or when I need the meditative calm that comes from creaming butter and sugar together. Bake them soon, and I promise they'll become your own kind of comfort too.
Common Questions
- → What makes velvet cupcakes different from regular cupcakes?
Velvet cupcakes use buttermilk and vinegar which react to create an exceptionally tender, fine-crumbed texture with subtle tanginess that balances sweetness.
- → Can I use natural ingredients instead of food coloring?
Yes! Replace pink gel coloring with 1-2 teaspoons of beet powder for a natural pink hue without artificial dyes.
- → How do I store frosted cupcakes?
Keep frosted cupcakes in an airtight container at cool room temperature for up to 2 days. Avoid refrigeration as it can dry out the crumb.
- → Why must ingredients be at room temperature?
Room-temperature ingredients emulsify properly, creating a smooth batter that bakes evenly with the best texture and rise.
- → Can I make mini cupcakes with this recipe?
Absolutely! Fill mini liners halfway and reduce baking time to 10-12 minutes, watching closely to prevent overbaking.